Make Your Own Bow Ties At Home

Bow ties have made it back into the fashion world as a popular accessory for men to wear. Whether you prefer a clip-on style or a tie-it-yourself version, there are many choices out there. If you have a crafty touch or a little sewing experience, you can sew one yourself quite easily. They also make excellent presents for boyfriends! Bring back some old haberdashery feel and let’s get started making a bow tie!

Image: Garden & Gun
This first version is the tie-on. You can easily make a whole bunch of these for the groomsmen in a wedding, for a little brother, or for a special handmade gift for a boyfriend or husband. These patterns are super simple and you only need a few materials. All these materials can be found at your local fabric store, just a few blocks away from AVA U District.
Materials:
- ½ fabric (cotton or cotton blends are great options for beginners. More experienced sewers can use silk or wool fabrics)
- ½ yard fusible interfacing (iron on)
- Matching thread
- Scissors
- Iron
Directions:
- Print or trace the pattern (available here). Tape the two pieces of the pattern together at the neck.
- Pin your pattern to your fabric and cut out the entire pattern 4 times. Repeat with interfacing, but only cut 2 pieces.
- Iron on the interfacing to the wrong side (the side you won’t see) of 2 of the pieces of fabric.
- Take 1 piece with interfacing, and 1 piece without, and pin them right sides together. Sew them with a ¼ inch seam allowance all the way around, leaving the end of the neck portion open. (This is where you will connect both sides together at the end.)
- Repeat with the remaining two pieces.
- Turn them inside out. Use a pencil, or other long thin object to help you.
- If you know the exact neck measurements of your model, you can simply sew the two neck pieces together at the appropriate length. Otherwise, you can use buttons or metal slider pieces to make them adjustable.
- Take your two pieces, and turn in the open portion about ¼ inch so that the seams are hidden inside. Sew over this to sew it shut.
- Now make button holes on one side, and sew 2-3 buttons on the other side depending on how much you want the person to be able to adjust it. Alternatively buy metal sliders at the sewing store, and follow the packages directions on how to attach them.
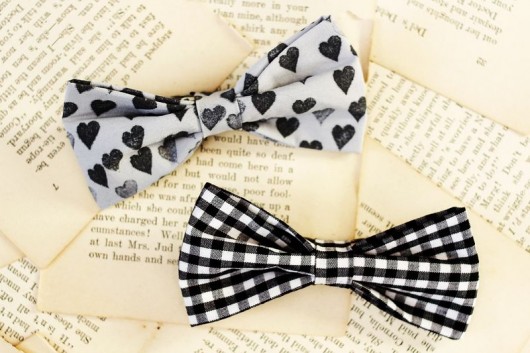
Image: A Beautiful Mess
Making clip-on bow ties is even easier. Some tutorials don’t even require any sewing. You can make a bunch of different colors and patterns in one sitting! You can easily find clip-on metal parts online by doing a quick search. You might even be lucky enough to find some new dead stock vintage bow tie pieces on eBay.
Materials:
- ¼ yard fabric
- ¼ yard fusible interfacing (if you are using a thicker fabric like a wool blend, or flannel you won’t need it)
- Scissors
- Matching thread
- Metal clip-on piece
Find the instructions on A Beautiful Mess. You can of course make these with more feminine fabrics and turn them into women’s bow ties, or even attach them onto barrettes or bobby pins to wear in your hair. These are very versatile patterns!
If you aren’t the crafty type, there are plenty of well made, classic bow ties you can find easily on the internet. A few places you can find some bow ties are Forage Bowties, Two Guys Bowties for some unique wooden ties, and Pomp and Ceremony for a more vintage feel.